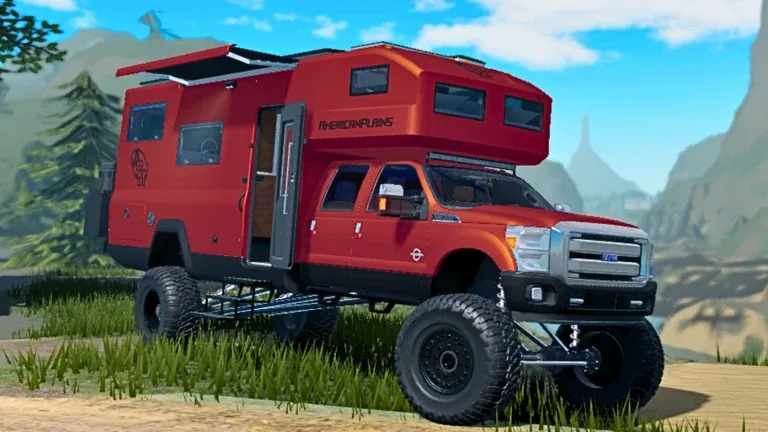
American Plains Mudding Offroad Truck Builds Guide
Discover creative ways to customize your truck in American Plains Mudding on Roblox using advanced placement techniques for custom mods and lighting.
Published: American Plains Mudding Wiki Editorial Team
Table of Contents
Mastering Custom Truck Builds in American Plains Mudding
In American Plains Mudding, the customization shop is just the starting point for personalizing your off-road machine. Many players go beyond the standard menus by using the game’s object placement system to create unique, custom aesthetics. Whether you want a high-end audio setup, a custom antenna, or specialized rock lighting, these builds rely on patience, precise driving, and clever use of in-game tools.
To begin any custom build, you must first master the art of straight parking. Because the placement rotation (controlled by the T key) depends on your vehicle's orientation, parking perfectly straight in a marked bay is essential. If your truck is angled, your modifications will look misaligned or "glitched" in an undesirable way.
Creating Custom Interior and Exterior Mods
One of the most popular ways to make your pickup stand out at truck meets is by installing a "custom subwoofer" setup. This is a purely visual modification that adds a professional, rugged look to your truck bed.
Preparation: Spawn a pickup truck and head to the tool store.
Gather Materials: Collect three toolboxes. You can do this by picking one up, placing it, grabbing another, and then removing the first two to consolidate them into your inventory.
Positioning: Park your truck perfectly straight in a marked parking space. Remove any rear hitches to ensure a flush surface.
Placement: Use the T key to rotate the toolboxes so they face outward. Place them side-by-side at the end of the truck bed, ensuring they are flush with the tailgate area.
Refinement: Once placed, you can remove the tailgate to make the mod look integrated into the chassis.
Community reports suggest that using a black or orange paint scheme on your truck makes these custom additions pop, especially at night or during community-hosted truck shows.
Adding Custom Antennas and Details
If you are looking for a subtle detail that adds to the "off-road" aesthetic, an antenna is a simple yet effective choice. This modification uses the USA flag item available in the store.
Tip
While the flag might look slightly out of place initially, using the T key to flip it upside down allows you to tuck it into the back seat area of your truck. This creates the illusion of an antenna base. If the flag's texture persists through the windows, applying a window tint will help hide the base while keeping the "antenna" visible.
Implementing Custom Rock Lights and Underglow
Underglow is a staple of the off-road scene, and in American Plains Mudding, you can create your own version of "rock lights" using standard light items found in the shop.
Warning
You are generally limited to placing three light units at a time. If you want a full four-corner setup, you will need to utilize an alternate account to place the final light, or simply accept a three-light configuration.
Positioning: Park your truck with enough room on both sides to maneuver.
Alignment: Place the light items near the wheel arches. Use the T key to rotate them upside down so the light source points toward the ground.
Deployment: Walk up to the placed light and select "Toggle Deployment."
Adjustment: Hold the "Tilt Light Up" function for approximately 3 seconds. This will clip the light into the wheel arch area, hiding the physical item while allowing the light effect to shine through.
Testing: Turn your vehicle lights on to verify the glow. If the light is too visible or not visible enough, adjust the distance from the wheel arch accordingly.
Why Custom Builds Matter for the Community
Custom builds are more than just aesthetic choices; they are a way to express creativity within the Roblox engine. By manipulating items like hay bales and lights, players create a unique identity for their vehicles that cannot be replicated by the standard in-game customization menu.
Always remember that these builds are experimental. If you make a mistake, be careful when using the "remove" tool. Clicking the wrong object can force you to restart the entire placement process. For those looking to see these builds in action, keeping an eye on community-shared content from creators like Dusty TV or the 13 Euro Bros can provide visual inspiration for your next project.
Frequently Asked Questions
Can I save these custom builds to my truck permanently?
Currently, these custom builds are temporary placements. If you respawn your truck or leave the server, the items will reset. They are best used for truck meets, photo opportunities, or social events.
Why are my lights flickering or not showing up?
This is often due to the clipping depth. If the light is placed too far inside the truck geometry, it may be occluded. Try adjusting the tilt duration (1-3 seconds) to find the "sweet spot" where the light shines through the wheel well without the object being fully exposed.
Is it possible to place more than three lights?
As per community testing, the game limits the number of light objects a single player can place to three. To bypass this, some players collaborate with friends or use an alternate account to place the remaining lights on the front of the vehicle.